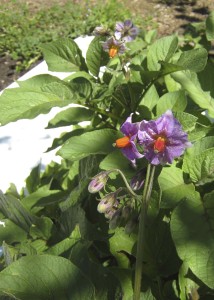
One of the most rewarding veggie crops to grow – it’s almost fail-proof and so fun to dig under the plant for breakfast potatoes!
Botanical Information
Taxonomy
- Tomato family; relatives of eggplant, peppers, tomatillos & tomatoes (RVGPS)
History
Physical Description
Varieties & Cultivars
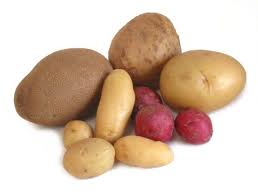
Categories or Types of Potatoes
Earlies (aka New Potatoes) Early Potatoes take up to 110 days
- Accent: GV-111: Recommended variety
- BF15: GV-111: Recommended variety
- Carola (aka Carole):
- sunny yellow potato from Germany; smooth, creamy texture and exceptional flavor. Suitable for baking or frying. 90-110 days to maturity
- lightly spreading plant with medium green leaves that are deeply veined. Flowers are snowy white. The potatoes are medium sized with smooth skin. Flesh is buttery yellow and very creamy. Good for grilling, roasting, baking steaming and mashing. Relatively low in starch. Very good keeper – even when harvested young, they will keep for months. Resistant to scab and rotting
- SSE: good keeper
- Concorde: GV-111: Recommended variety
- Dunluce: GV-111: Recommended variety
- Epicure: GV-111: Recommended variety
- Foremost: GV-111: Recommended variety; white skin; white flesh
- International Kidney: GV-111: Recommended variety; waxy salad potato
- Red Duke of York: GV-111: Recommended variety; red skin
- Red Gold:
- SSE: best used by the fall, as they don’t keep long
- Johnnys: lightly netted skin of an orange-red color; flesh is yellow, flaky and delicious; high yields of uniform potatoes, medium-sized; scab and virus resistant variety introduced in 1987 from Canada; not recommended for long term storage
- Rose Gold:
- SSE: best used by fall; don’t keep long
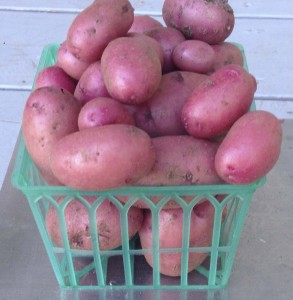
- various seed vendors: smooth red skin, golden flesh is mildly dry and good for just about any cooking use. The plant has pink blossoms and forms small to medium tubers. One vendor’s maturity dates were 90-100 days, while another’s were 70-90. Scab resistant; pollution resistant
- Salad Blue:
- GV-111: Recommended variety; heritage potato, blue skin, alarming vivid blue flesh
- www.heritage-potatoes.co.uk: First grown in Scotland in 1900’s, Salad Blue is very blue. The skin and flesh are both a strong, deep blue. The potato is not a salad – it has high dry matter and fries and mashes well but it does not boil well because it is fluffy and disintegrates. Tuber shape is short and oval. Flavour is mild although texture is quite good. The blue pigment is an anthocyanin. It is an antioxidant, and Nutritionalists say antioxidants provide many health benefits, including protection against cancer and other diseases. Makes great novelty blue mash.
- Swift: GV-111: Recommended variety
- Winston: GV-111: Recommended variety
Second Early Potatoes (110-120 days)
- Belle de Fontenay
- GV-111: Recommended variety; waxy salad potato
- Charlotte
- GV-111: Recommended variety; waxy salad potato; white skin
- Estima
- GV-111: Recommended variety;
- Kondor
- GV-111: Recommended variety;
- Picasso
- GV-111: Recommended variety;
- Ratte
- GV-111: Recommended variety;
- Roseval
- GV-111: waxy salad potato
- Wilja
- GV-111: recommended variety; fluffy potatoes ideal for baking and roasting.
Maincrops
- Champion
- GV-111: recommended variety; heritage potato
- King Edward
- GV-111: Recommended variety; fluffy potatoes ideal for baking and roasting.
- Wikipedia: King Edward potatoes, like the majority of European and North American potato varieties, are derivatives of the ‘Rough Purple Chili’[1] which was used as breeding stock after the 1840s Irish potato famine.[2] The King Edward potato is one of the oldest of these varieties. The King Edward potato is predominately white skinned with pink colouration. It is mostly oval in shape with a floury texture and shallow eyes.[3] The plant is upright and tall with numerous stems and small green leaves. Its flowers are purple with white tipped petals. The King Edward potato is a main crop and in the UK it is traditionally planted in April for harvest in September.[6] It is suitable to be grown commercially or in the allotment and can even be grown in pots, although smaller ‘first early’ varieties are a more advisable choice for pot cultivation. To do well King Edwards require soil that is rich in humus (farm-yard manure/compost) in combination with feeding via a general fertiliser. It is also advisable to ensure plenty of watering during dry periods. Suggested spacing in a traditional plot are at a depth of 4″; spacing in row – 12-16″; width between rows – 28-30″.[7] It is very resistant to Potato scab and offers some resistance to Potato blight but is susceptible to Potato cyst nematode.[5]. King Edwards are not particularly prolific in terms of yield, but many people still grow them for their floury texture and their taste. The King Edward has a variety of culinary uses and is renowned for its light fluffy texture, for this reason it is particularly suitable for roasting and baking although it is also suitable for chipping, sauté and steaming. It has been specially identified by Delia Smith as being the best potato with which to make gnocchi.[8]
- Highland Burgundy Red
- GV-111: Recommended variety; red flesh with white margin underneath the skin; red skin; heritage potato
- www.heritage-potatoes.co.uk: This variety dates back to at least 1936 when it was used to add appropriate colour to a meal for the Duke of Burgundy in the Savoy. Highland Burgundy Red is mostly burgundy red inside with a definite ring of white flesh just under the skin. Highland Burgundy red has a dull russet layer over a bright burgundy skin. The tubers are oval to long oval. They make excellent novelty chips, crisps and mash. Nutritionalists say that the antioxidants provide many health benefits, including protection against cancer and other diseases.
- Kepplestone Kidney
- GV-111: recommended variety; heritage potato;
- www.heritage-potatoes.co.uk: Kepplestone Kidney 1919 is an unusual variety, which was bred in Scotland.The colour of the skin when the potato is raw is blue. However, once cooled it becomes a creamy colour. The shape is long, and more pointed at one end, and it is often known as ram’s horn. The texture of the flesh is floury , ansd the colour of the flesh is yellow. They have a good flavour. They are good for baking , crisps, and mash
- Maxine
- GV-111: Recommended variety; pink skin
- Mr. Little’s Yetholm Gypsy
- GV-111: Recommended variety; heritage potato
- www.heritage-potatoes.co.uk: Mr Little’s Yetholm Gypsy Heritage Potato has a special history for us , and the people in the borders! It was developed in the Border Village of Yetholm, which is the Gypsy capital of the borders by the Little Brothers. It is unusual because it is the only potato to show red white and blue skin. It is best boiled or steamed with the skin on , and the colour remains , and the flavour is a mealy and quite delicious. White flesh.
- Navan
- GV-111: Recommended variety;
- Nicola
- GV-111: Recommended variety;
- Pink Fir Apple
- GV-111: Recommended variety; waxy salad potato; knobby
- Yukon Gold
- GV-111: Recommended variety;
- Witch Hill
- GV-111: Recommended variety; heritage potato
- www.heritage-potatoes.co.uk: Witchhill 1881 was bred by Alan Brown of Fraserburgh, Aberdeenshire. This heritage potato is an attractive round shape, with an excellent flavour. white skin; white flesh.
Colors Available
Notes on Potato Varieties
Growth Requirements
Climate & Temperature Requirements
Air Temperature
- sensitive to frost, so cover young plants if there is any danger of a late frost (GV-107)
- They can tolerate a light frost (SSE)
Soil Temperature
- best growth when soil is at least 50°F (RVGPS-330)
- wait till soil is at least 45°F (GV-107)
- potatoes won’t start to grow until soil is 45°F (SSE)
Humidity
Day Length or Light Requirements
- Potatoes do best when planted in full sun
Site Conditions Favored
- choose an open site where potatoes or onions or other root vegetables were grown right before. The best situation would be to plant where you have grown beans or peas in the previous year
Soil Requirements
Soil Texture
- well-drained soil is a must. if it’s not, then build a raised bed, or you can surface-plant the potatoes (RVGPS-330, GV-107)
- potatoes love a light, loose, well-drained soil, since they must be able to root well; soil should be moist but not waterlogged. Cultivate soil to remove weeds, which compete with the potatoes. It will also ensure very loose soil (SSE)
pH
- 5.0-6.0 (GV)
- 5.0-7.0 (SSE)
Nutrient Requirements
- The best situation would be to plant where you have grown beans or peas in the previous year
- moderately fertile, enriched with organic matter. If soil fertility is low, add 4 lbs of balanced blended organic fertilizer per 100 sq ft and work into the top several inches before planting (RVGPS-330)
- dig in some bulky organic material such as well-rotted manure or compost during the preceding fall or the winter months (GV-107)
Propagation
Methods of Propagation
Seeds
- growing from seed is almost unknown (GV)
- seed potatoes, which are small potatoes saved from last season’s crop are the preferred method of starting potatoes
Seed Potatoes
-
- 2 to 2.5 pounds of seed potatoes plants 25 row feet.
- it’s critical to buy certified disease-free seed potatoes. (RVGPS)
- the flesh of the seed potato is the food that will fuel the plant growth for up to 3-weeks (RVGPS)
- tubers left in the ground will often sprout the next year, however this isn’t advisable, as they tend to become diseased. It’s safer to buy new, certified disease-free seed potatoes. (GV)
- Seed potatoes are commercially grown tubers that can generally be relied on to be disease-free. They are usually available in midwinter.
Chitting
-
-
- Chitting, or presprouting, seed potatoes shortens the time between planting and harvesting. (GV, RVGPS)
- lowers the risk of pest and disease problems (RVGPS)
- gives higher yields, since all of the buds sprout uniformly (RVGPS)
- three different sources on How to Chit or Presprout Potatoes:
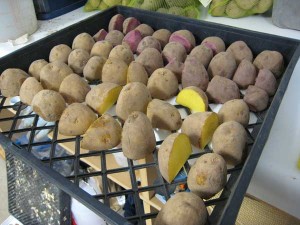
- To chit your seed potatoes, lay potatoes out in single layers in egg boxes or seed trays, so that the ends with the most eyes are pointing up. Keep in a cool, light place; soon the eyes will begin to sprout into strong, dark, “chits”, about 3/4″ long. If it’s too warm or too dark, chits may be pale, weak, and long (GV)
- To presprout your potatoes, 2-weeks before you plan to plant them, put them in a warm spot, about 70 degrees F. Spread them on a sheet of newspaper on a counter, or lay them in a single layer ina shallow box or seed flat. They need light, but not direct sunlight. Once the sprouts are 1/2″ long, cut the seed potatoes that are larger than the size of an egg into pieces that have at least 2 eyes and weigh no less than 1 oz. If any pieces show dark rings or discoloration in the flesh, discard them. If you have clay soil, let the cuts harden for a couple of days before planting; otherwise, they can be planted right away. (RVGPS)
- A week or two before your planting date, set seed potatoes out under light with temperatures between 60 & 70 degrees F to get them to sprout. Cut them into smaller pieces, no smaller than 2″ square with at least 1 or 2 eyes, if they are larger than a golf ball. They will dry where you cut them in a few days, which will prevent rot when planted. Make sure to use a sterile, sharp knife.
-
Saving Seed Stock
-
- SSE: Save the very best potatoes for planting next year. You may find that the size of the resulting potatoes decreases over the next several years, which is typical. They are also very susceptible to diseases. For maximum yields and healthy crops, it’s best to start with fresh, USDA Certified Seed Stock every year.
Microplants
- specilist heritage varietes can be grown from microplants (GV)
Cuttings
Division
Transplanting or Potting Up
Seed Saving
Planting Out
-
Planting Time
- Usually about 3-weeks before the last expected spring frost. (RVGPS)
- plant seed potatoes outdoors in early or mid-spring when the soil has warmed up to at least 45 degrees F and, if possible, when there’s no longer a chance of a severe frost. (GV)
- buy seed potatoes and start chitting in January to be ready for planting in early or mid-spring. (GV)
- plant your first early seed potatoes in March (GV)
- plant last of the seed potatoes in May (GV)
- plant potatoes as soon as the ground an be worked in the early spring, but soil temperatures are important. See “Growth Requirements” for Soil Temperature info. Plant a second crop as late as June 15 for a longer harvest time. (SSE)
Bed Prep & Soil Amendments
- If soil fertility is low, add 4 lbs of balanced blended organic fertilizer per 100 sq ft and work into the top several inches before planting (RVGPS-330)
- dig in some bulky organic material such as well-rotted manure or compost during the preceding fall or the winter months (GV-107)
Planting Bed Methods
Trench Method
-
- this is the traditional method to grow potatoes. Dig trench at least 4″ down, lay seed potatoes in the bottom of the trench and cover with at least 2″ of soil. As foliage emerges, fill the trench with more soil. Loosen the soil around the plants at least once as they continue to grow. By the end of the season, the plants will be covered by a low mound of soil. (RVGPS)
- Just before planting, some people pick off all but three of the chits. This may give you larger potatoes but will probably also produce lower overall yield. Dig a drill about 6″ deep and within it place the potatoes with their chits uppermost; this is called the “rose”. if you need to, sprinkle some general-purpose fertilizer in the bottom of the trench, before placing the seed potatoes. Space earlies 12-14″ apart in rows about 18″ apart. Give second earlies and maincrop varieties slightly more room: plant them 15″ apart in rows about 30″ apart. Use a rake to push the soil back over the potatoes to a depth of at least 1″. (GV)
- Preferred method of Seed Savers Exchange. Prior to planting, the soil should be cultivated one last time, which will remove any weeds and loosen the soil. Dig a trench 6-8″ deep, then plant each potato piece (cut-side-down, eyes pointing up) 12″ apart. They can be as much as 15″ apart, if you want bigger potatoes. The rows of trenches should be 36″ apart. For smaller potatoes, also called New Potatoes, they can be spaced closer together. Fill the trench with only 4″ of soil, then continue to fill the trench as the plants mature, mounding the soil around the base of the plants as they continue to grow.
Surface Method
-
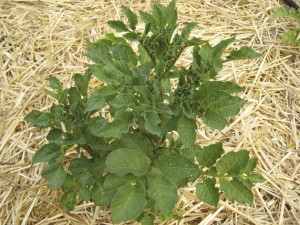
- Loosen the top few inches of soil. Lay seed potatoes down, cut-side down. Mulch with shredded leaves, leaf mold, or clean straw. Add mulch as the plants grow, maintiaining a layer several inches thick over the tubers. This method involves less digging & bending, but the yields are lower than with trenches. Because there is not any nutrients in the mulch, you will want to spray with a fish emulsion/seaweed spray shortly after sprouts emerge and again just before plants flower. (RVGPS)
Container Gardening
- potatoes grow well in containers such as bushel baskets and even plastic trash cans. provide drainage holes; put a few inches of soil in the bottom, lay seed pototaoes on the soil, then cover with a few more inches of soil. Continue adding soil, compost, or mulch as the stems lengthen. To harvest, carefully tip the container on its side and let the contents spill out. (RVGPS)
- Potatoes need deep containers. Plant them about a third of the way down, cover, and top off the soil as they grow. potatoes will form higher up on the stem, as it’s covered. (GV)
Routine Cultivation & Maintenance
Water Requirements
- soil should be moist but not waterlogged (SSE)
- pay attention to watering since they have shallow roots. Lots of water is needed once foliage has fully developed and tubers are enlarging. In sandy soil you may need to water as often as every 3 days. Cut back on water when foliage starts to turn yellow; otherwise, the tubers will rot (RVGPS)
- keep early plantings watered, but later maincrop varieties don’t need watering until the tubers have started developing. (GV)
- water well throughout summer; critical watering time is while they are flowering and immediately following the flowering stage. This is when tubers are forming. Water is critical to tuber formation. 1-2″ per week is advised. Discontinue watering when potato foliage turns yellow and begins to die back. The lack of water will start curing the potatoes for harvest. (SSE)
Fertilization Recommendations
- giving potatoes an organic liquid fertilizer or applying a top-dressing of nitrogenous fertilizer may help increase the yield. (GV)
Mulching & Weeding
- Cultivate soil to remove weeds, which compete with the potatoes; it will also ensure very loose soil (SSE)
- soil or mulch is required to protect tubers from light, injury, and temperature fluctuations. A thick layer of mulch also protects the tubers from fungal spores and insects that sometimes reach tubers through soil cracks or by washing through a shallow mulch layer. (RVGPS)
Hilling or Earthing Up
- as the plants grow, they need “earthing up” to ensure that the potatoes remain underground, out of the light. Otherwise, they turn green and become inedible. When the stems reach about 9: tall, rake or draw soil up around them, leaving about 4″ of foliage above the surface to keep growing. You may need to repeat the process once or twice more throughout the summer. (GV)
- Start earthing up potatoes in Late Sring (May) to protect developing tubers from exposure to the light. (GV)
Pinching or Pruning & Dividing
Support
Winterizing
Companion Planting
Helpful Companions
Harmful Companions
Companion to..
Pests, Diseases & Problems
Common Pests
Common Diseases
Symptoms
- Close up of leafhopper damage on potato leaf
Whole Plant
Leaves
- Curled under & puckered leaves
- look for potato aphids (pinkish or greenish) on underside
- chewed foliage
- blister beetles (don’t touch them without gloves)
- cabbage loopers (large holes)
- hand pick
- not seriously damaging
- Colorado potato beetles (large holes)
- hand pick
- plant can withstand moderate damage (RGVPS)
- resistant to most pesticides (GV)
- cucumber beetles (medium-sized holes with strands of leaf veins left connected)
- cutworms (large holes)
- handpick
- flea beetles (tiny holes, sometimes not completely through the leaf)
- usually don’t seriously damage the plant, but their larvae can injure potato tubers
- white stippling on leaves
- yellow leaves, wilting, possibly stunted plant
- white grubs
- tuberworms
- wireworms
- Black Leg
- verticilium wilt
- root knot nematode (tubers will also have wart-like bumps on them)
Stem/Trunk
Flowers
Roots or Tubers
- Tiny cracks making a rough surface of potato
- flea beetles
- still edible but not good for storage
- flea beetles
- shallow holes in tuber
- white grubs of Japanese Beetle or May/June bugs
- still edible but not good for storage
- white grubs of Japanese Beetle or May/June bugs
- tiny holes, drilled right in to the tuber
- Bumps:
- smooth, rounded raised bumps (although once source said they are wart-like HNIDC)
- root knot nematodes (leaves will also be yellow & wilted, possibly stunted plant)
- wart-like & raised
- smooth, rounded raised bumps (although once source said they are wart-like HNIDC)
Harvesting & Storage
Edible Parts of the Plant
The tubers produced by the roots are the only edible parts of the potato plant. Like the other nightshades, the stems and leaves are toxic.
Yield
- 20 row feet can yield 25-30 lbs in a good year (RVGPS)
- 2 to 2.5 lbs of seed potatoes plants 25 row feet => 2 to 2.5 lbs of seed potatoes yields about 30 lbs of potatoes
Days to Harvest / Harvest Timing
- Harvest in Summer or Fall, depending on variety; plant a mixture of early and maincrop varieties so you can harvest from summer through to mid- or even late fall. When flowers open, it’s usually a sign that harvesting time has arrived. (GV)
- exact timing depends on the cultivars, the weather, soil conditions, etc. Flowers are one indication; you should be able to lift potatoes when, or just before they flower. The only way to be certian is to scrape back some of the soil froma plant and take a look. (GV)
- Earlies: 100-110 days after planting
- Second Earlies: 110-120 days
- Maincrops: 125-140 days, but can be left in the ground longer, provided they’re lifted before the first frosts arrive. They will continue to grow larger, but the downside is that they’re more likely to be attacked by slugs, worms, and scab. it is best, though, to cut off the stems (known as “haulms”) as they begin to die down and fall
- Full Size Potatoes are ready to be harvested when the vines die back on their own, as the crop matures; if it is getting close to your frost date, though, you can cut the plant off at the soil level 2 weeks before you need to dig them up. This triggers the potatoes to harden which helps them last longer in storage (RVGPS)
- When foliage starts to yellow and die back, it’s time to cut off watering. This will cause the tubers to start to cure for harvest. (SSE)
- For Irish potatoes, when the plant tops begin to dry out and die back, harvest your potato tubers VG
New Potatoes
-
New Potatoes can be harvested anytime after the flowers are blooming
- potato flowers are usually a sign that the moment for harvesting has arrived. A trial excavation will confirm whether your potatoes are ready for lifting. (GV)
- Baby potatoes can be harvested about 2-3 weeks after the plants have finished flowering. (SSE)
Harvest Methods
- New Potatoes: gently dig around the plants to remove potatoes for fresh eating. Don’t be too aggressive; try to only remove the biggest new potatoes and leave the smaller ones connected to the plant so they can grow. Only harvest what’s needed right then, since they don’t store long (although I’ve stored them successfully in the bottom of the refrigerator, in a plastic bag for up to 10 months – it’s important that they aren’t washed before storing)
- To harvest potatoes that are going to be stored, wait 2-3 weeks until after the foliage has died back, then carefully dig potatoes with a pitch fork. If the weather is dry, just turn the soil to expose the tubers to the air, and allow them to sit like that for a few days. This cures the potato skins for good storage. If the weather is humid or wet, pull them all out of the soil and arranged them in a dry, protected area to cure. (SSE)
Storage of harvest
Fresh
- Full-size potatoes should last the winter in storage; eat or discard damaged tubers, since they won’t keep. Store dry potatoes in paper sacks or bags – not plastic, which will make them sweat. (GV)
- when harvesting for storage, it’s best to lift them when it’s not raining, and leave them to dry in the sun for a few hours. Set aside any damaged tubers for immediate use and store the remainder in double-layered paper bags. Stake them in a cool, dry, and well-ventilated place, making sure you cover them to keep out the light. Alternatively, make a special “clamp” for storing them outdoors. (GV)
- In an underground root cellar, potatoes should keep well into the spring. The storage area should be dark, cool, and well-ventilated, with temperatures ranging 35-40 degrees F. Some varieties store better than others, so read those catalogs. Red Gold and Rose Gold are not long keepers; Carola and Russets are exceptional keepers.
- Store them in a cool location with good ventilation. Keeping them out of sunlight is key as they will develop toxic alkaloids which you will recognize as turning green VG
Canned
Frozen
Pickled
Dried
Cooking
Nutritional Benefits & Values
Toxicity
Cooking
Preparation
Cooking Methods
Recipes (link to …/category/recipes/tag/[plantname])
Sources
Information for this article was taken from these sources:

